Open top menu
13 Nov 2013
Car Light Trails

Need some photography ideas for night? Try shooting some creative light trails of cars using just a camera and tripod. The whole idea behind this is to take long exposure shots of moving cars where the head light and tail lights of moving cars will form light trails on the camera sensor.
EXIF: ISO100 and F/11 at 10 secs (0 EV).

Locations

Typically, light trails of moving cars are taken from a high-level ground (e.g. bridge or from apartment which has a nice street traffic view) where a long stretch road with unobstructed traffic can be seen. The effects would be exceptionally nice if the roads are full of turns and bends.

However, shooting car light trails at ground level view e.g. traffic junctions, could also produce very interesting results with the lights of cars turning in different directions. Do bear careful to observe the traffic if taking near roadside.

Camera Settings

There is no one fixed settings for taking car light trails as it depends on the ambient lighting condition on the roads, so the settings would have to be adjusted accordingly to match the scene ... basically trial and error. Here are a few pointers though:
  • Use low ISO 100 to reduce as much noise from the shadows and long exposure.
  • An exposure time of 10 secs to 15 secs should be sufficient to capture beautiful light trails of cars. A longer exposure time may wash out the light trails and ended up with thick bands of lights which may not look nice (see photograph below which is shot with a longer exposure compared to the 1st photograph). Once again, it depends on the amount of traffic on the roads.
EXIF: ISO100 and F/16 at 30 secs (0 EV)
  • The aperture should be compensated accordingly for the amount of exposure time that will be used. Use the camera's metering to determine the amount of aperture to use. An small aperture of F/8 or higher would be better for a good enough depth of field.
  • Switch to manual focus, and focus halfway down the road or on something which you want it to be captured visually strong in your frame.
  • Shoot in RAW to allow more control over white balance, exposure, etc. Do note that street lights and car lights does produce a orange cast in the photographs taken.
  • Taking car light trails during twilight hours (i.e. when the sun is just about to set) could produced a nice picture with a natural atmospheric ambience light with artificial light trails from cars.

Try Creating a Traffic 'Heat Map'

To create a traffic 'heat map' showing frequency of traffic (i.e. see 1st picture above), I had stacked 6 photographs of the same scene taken with different car light trails and blend them using 'Difference' blending mode in Photoshop to produce an array of colored car light trails. Follow the following steps using Photoshop:
  • From Photoshop, select Files --> Scripts --> Load Files Into Stack ...
  • Select all the car light trail photographs taken from the same scene and click 'OK'. 
  • Once all the photographs are loaded into stack which you can see each photograph as a layer, you will need to change the Blending Mode for each layer to 'Difference'.
  • Merge all the layers into one and you have the traffic 'heat map'.

Please visit http://jefzlim.smugmug.com/Themes/Light-Trails for the higher resolution photos ...


Read more
12 Nov 2013
Light Painting: Creating Light Spirals ...

In this project, I played with more examples of light painting by creating different spinning light spirals at home by making use of a torch light. There are a few ways that spinning light spirals can be created at home.

Spinning Light Spirals from a Suspended Torch Light on Ceiling


Torch Light + String

Besides from the torch light, a string with considerable length will be required. One end of the string will be used to secure to the torch light (note: I also use masking tape to 'double' secure it), while the other end will be secured to the ceiling or ceiling light. 

The string needs to be tightly secured on both ends, otherwise the entire torch light may be sent flying off and hit someone or break something. On the torch's end, I had use masking tape to 'double' secure the string to it even after tying it. On the ceiling light's end, I simply wrap the string around the ceiling light and make a knot.

Note: How far the torch light is suspended from the ceiling will determine how big or small the spinning trail is, as well as whether the camera lens is wide enough to capture the spinning trail.

Camera, Tripods and Settings

Have the camera mounted on a low tripod and pointing directly upwards towards the suspended torch light. It would be better if an wide angle lens is used, considering the distance away from the subject and the width of the circular spinning path that the torch light would make.

Pre-focus the camera on the suspended torch light in the air using automatic-focus before switching back to manual focus. 

Depending on the strength of the light from the torch, the aperture and shutter shutter speed would need to be adjusted accordingly. Start with an aperture of F/8 and stop-down the aperture if the spinning trails are overly-exposed. An exposure time of 20 seconds is good as a start - the exposure time will also depend on how long the torch light can be sent spinning in a smooth circular motion.

Spin and Take the Shot

Turn on the light of the suspended torch light and send it swinging in a circular motion. Remember to switch off all other lights in the room before taking the shot (note: best to be done in a dark room without other ambient lighting).

Try other modifications like:
  • Different color gels over the suspend torch light.
  • Instead of circular motion path, try sending the suspended torch swinging in erratic patterns.
  • Try attaching additional colors of light sources to the suspended torch (note: need to make sure that the string can take the weight of additional light sources and they are all properly secured.)

Spinning Light Spirals with Hand (Light Orbs)


Torch Light + String

Same as the 1st example, the torch light needs to be tightly secured to the string on one end. The other end needs to be hand-held as we will be spinning the suspended torch light.

Note: The spinning force can be quite great even for a small torch light. It is best to wear a glove to prevent the string from cutting your hand or causing blisters. I had blister from it for not wearing a glove :)

Camera, Tripod and Settings

The camera and tripod should be a distance away, enough to capture the entire spinning motion. If the house is not big enough, take it outdoor.

The camera settings is pretty much the something that have to be experimented with. For this particular setup, it might be good to set exposure time of 1minute so that sufficient light trails can be captured to give a nice looking orb.

Technique in Spinning

To create a nice looking light orb, it is best to spin and rotate about the same axis on the ground - do so by moving your body in a circle around the axis of the spin. Alternatively, you can try spinning the torch light with the body as the axis to create a different looking pattern i.e. rotate your body on the same spot while spinning the torch light.

For best effect, it is best to do it in a dark open space where there is no nearby objects where the light would fall on. Make sure that you are dressed in dark colors (i.e. best to be in black) from head to toe so that your image will not be captured in the frame causes by light falling on your clothes.

Note: The above light orb is shot in my room, which is a little bit cramp. Not a nice looking orb as it was my first time doing it :)

Spinning Light Spirals with USB Fan (Light Orbs)

I have also tried creating the light orb using an small USB fan (see picture below). Basically, I secured a mini Maglite (torch light) to one of the soft foam blades of the USB fan. When the fan is turned on, I simply rotate the entire USB fan in circle while the blades are rotating.

Although the spinning speed of the USB fan is relatively slow due to the weight of the torch light that is secured on the blade, the fan will still vibrate quite violently due to the unbalance weight on the blades. So make sure that the USB fan is held on tightly while rotating it.

Important: It is quite dangerous, and never try this on an electrical fan as the moving speed of a blades is so fast that it might throw the entire torch light flying, which could be fatal if it hits you.


Read more
11 Nov 2013
De-noise Using DxO Optics Pro 9

Yesterday's article on 'Challenging Photography at Night Safari', I posted a number of photographs that were taken in high ISO (i.e. ISO 25600). Honestly, this is the very first time where I had taken pictures at such high ISO and it gives me the opportunity to look into how to reduce the high noise produced at such high ISO.
Picture taken with ISO 25600, de-noised using DxO Optics Pro 9 (PRIME).

What is Image Noise?

Grainy-looking color splotches in photographs are known as noise (see picture below). Noise could either be a color noise or luminance noise (or both). Color noise shows up as colored pixels (e.g. red and green pixels) in the photographs, while luminance noise is prevalent in the brightness of a color (i.e. grains across a color).
A 100% cropped of a section from the 1st picture above, showing the amount of noise taken at ISO 25600 using Canon EOS 5D Mark II.

What Causes Image Noise?

Noise are produced in photographs which is caused by:
  • High ISO
  • Long exposure time
  • Small sensor size - small sensor size like phone cameras will produce grainier pictures as compared to DSLR sensor.
  • High ratio of pixel density to sensor size - A 20 megapixel on a small sensor will produce more noise compared to 20 megapixel on a larger sensor.
  • Shadows or poorly illuminated areas

How can Noise Be Reduced?

Besides from observing the above conditions that could result in noise when taking photographs, there are also other imaging softwares that could help to reduce noise during post-processing. I uses Apple's Aperture 3 in my processing workflow and rely on the adjustments (including de-noise) for 90% of my photographs, while the remaining 10% uses Photoshop for additional creativity work.

It is important to understand that when an image is de-noised, certain amount of details may be lost and the photograph may appear to be 'softer' (or losing some amount of sharpness) depending on the software used.

De-noise Comparison between Aperture 3, Nil Dfine 2 and DxO Optics Pro 9

For de-noise, Aperture 3 typically does a great work for most of my photographs since they are usually taken within an acceptable ISO level (up to 3200).

In these particular set of photographs taken at Singapore Night Safari using ISO 25600, I had compared the de-noise capability of Aperture 3, Nik Dfine 2 as well as the new DxO Optics Pro 9 which has introduced PRIME, a technology a revolutionary noise reduction which claim to be able to re-produce detailed, sharp and vividly-colored images.

Note: This is the first time using DxO Optics Pro 9, which I had downloaded the full-functional one-month try copy from DxO Mark. The adjustment are based on some of the preset functions offered in the software.

For comparison purposes, I've cropped out 50% of the full-size image above. Please click on the image to view the higher resolution image.

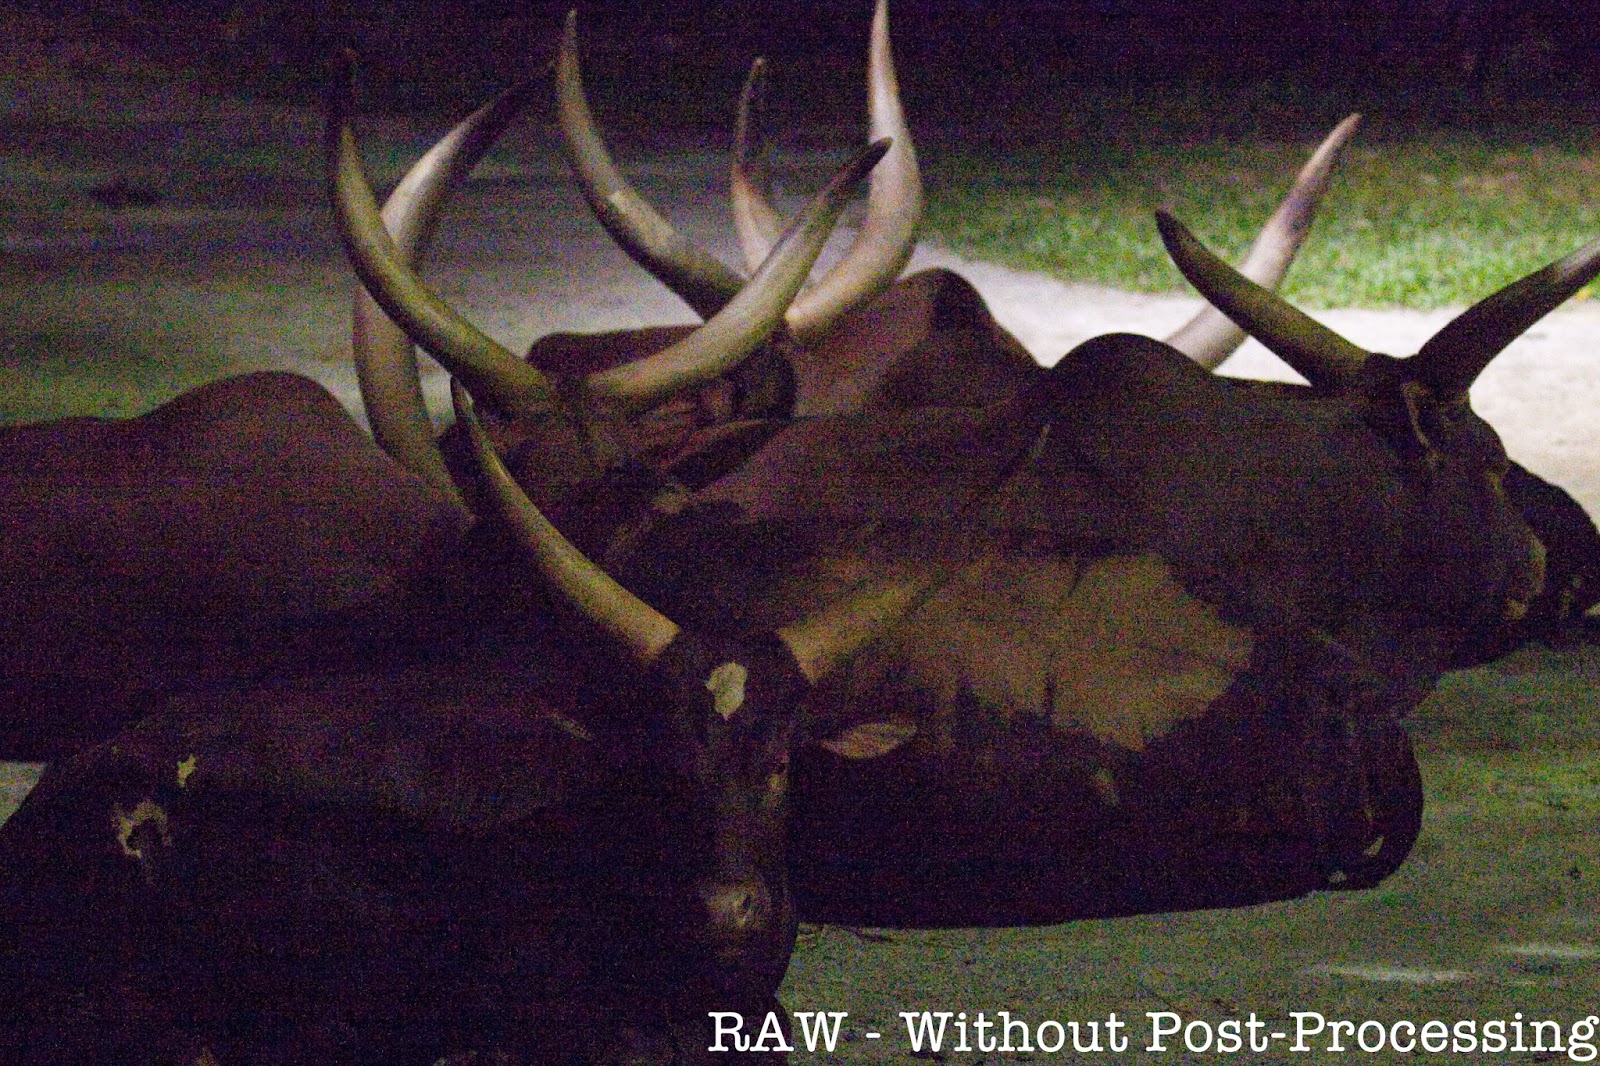
RAW Files Without Post-Processing

As seen from the RAW photographs below, the amount of noise taken at ISO 25600 is extremely high without any post-processing.


De-noise using Aperture 3

Aperture 3 does a fairly good job in removing most of the noise in the picture and yet retain most of the details. However, the picture appears to be a little 'soft' and unsharp due to the de-noising.


De-noise using Nik Dfine 2

There appears to be color splotches of noise despite pushing the color and contrast noise control to the extreme. Just like aperture 3, the photograph appear to be 'soft' and a little un-sharp due to the de-noising.


De-noise using DxO Optics Pro 9 (Standard)

DxO Optics Pro 9 offers standard de-noising function as well as the PRIME de-noising technology. The standard de-noising function does a very good job in removing the noise. The processed photograph is not as soft as compared with Aperture 3 and Nik's Dfine 2. There is also noticeable enhancement to the colors.


De-noise using DxO Optics Pro 9 (PRIME)

The PRIME de-noising function is remarkable. Very noticeable that the details and sharpness were retained. Not only that, the colors are also enhanced. I also noticed that some barrel distortion on the picture has also been corrected.

Conclusion

Picture speaks a thousand words - from the comparison, it is quite obvious that the DxO Optics Pro 9 produces remarkable results using its PRIME de-noising technology. However, it takes about 9-10 minutes processing time to output a single photograph of resolution 5616 x 3744 on my iMac (2.8GHz Intel iCore i5 with 8GB memory) which can be a major concern if processing hundreds of pictures.

Once again, the level of acceptable noise is very subjective to individuals. For me, I would still rely on Aperture 3 as my key workflow processing tool. Although I'm still using the free one-month trial of DxO Optics Pro 9, I may consider purchasing a licensed copy as it would give me the piece of mind without hesitation to bump the ISO, or recover a badly under-exposed photograph.

Note: DxO Optics Pro 9 is on an introductory offer till 20-Nov-2013. The standard edition costs 99 USD (instead of 169 USD), while the elite edition costs 199 USD (instead of 299 USD). Check it out at http://www.dxomark.com/.

Another picture taken with ISO 25600, de-noised using DxO Optics Pro 9 (PRIME).

Please visit http://jefzlim.smugmug.com/Destinations/Singapore/Night-Safari to see the entire bunch of photographs taken at Singapore Night Safari using ISO 25600 and de-noised using DxO Optics Pro 9 (PRIME).


Read more
10 Nov 2013
Challenging Photography at Night Safari

I love photographing wild life at the zoo, and the thought of photographing nocturnal wild life at Night Safari excites me. On Friday, I visited the Singapore Night Safari - the entire experience was really great where I can get really close to these nocturnal wild life during the tram ride and walking trails. However, photographing them has been a great challenge.
Picture taken at F/2.8, ISO 25600 and 1/8s (0 EV) using EOS 5D Mark II.

Key Challenges: Very Low Lighting Without Flash Photography

Many of us are used to taking photographs under a lighted environment, and even if lighting conditions is not ideal, we would pull out our flashes. 

At Night Safari, the lighting condition is far less than sufficient, which is obviously the case as the ambient lighting needs to fit the night environment for these nocturnal creatures. In addition, flash is prohibited as the bright light from the flashes may blind these nocturnal wild life.

Exactly how low or bad is the lighting condition? Just imagine with the widest aperture (F/2.8) used on ISO 25600, the camera would meter shutter speed in Aperture Priority (AP) mode to be within the range of 1/6 seconds to 1/30 seconds in most of the scenes.

Perhaps the consoling part is that these nocturnal creatures are pretty still or moving fairly slowly, which does not make it worse for the low shutter speed.
Picture taken at F/2.8, ISO 25600 and 1/25s (0 EV) using EOS 5D Mark II.

Techniques to Take Better Pictures Under Very Low Light Condition Without Flashes

Fast Lenses with Widest Aperture

Go for the lens that can give the widest aperture (i.e. smallest F-number) - will need all the lights that can get onto the sensor, hopefully without need to compensate too much on ISO and shutter speed.

Step-Up ISO

With the aperture wide-open, start stepping up the ISO until a sufficient shutter speed can be metered by the camera. If the "normal" ISO range could not get you the right exposure, then ISO expansion may need to be enabled from your camera's menu so that an extended range of ISO can be used. High ISO will produce a lot of noise in the photographs taken.

Note: High ISO will produce a lot of noise in the photographs taken. So, you may want to enable high ISO noise reduction from your camera's menu if using high ISO.
Picture taken at F/2.8, ISO 25600 and 1/10s (0 EV) using EOS 5D Mark II.

Exposure Compensation (EV)

If the speed is deemed to be still too low to hand-hold the camera, set the exposure compensation down a stop if using Aperture Priority (AP) mode. Doing so will increase the shutter speed a little. The exposure can be compensated back during the post-processing.
Picture taken at F/2.8, ISO 25600 and 1/30s (-1 EV) using EOS 5D Mark II.

Use Tripod/Monopod

If the shutter speed is relatively low and you do not have a good steady hand for hand-holding the camera, then using a tripod will help to prevent shakes which will result in a blur photograph taken. I've taken all Night Safari on hand-held - if I can do it, so can you :)

Anyway, a good way to gauge whether the shutter speed is fast enough to 'ignore' any slight mini movement is to check that the shutter speed is faster than the inverse focal length used i.e. if focal length is 200mm, any shutter speed lower than 1/200 seconds has higher chances to pick up any slight mini movement caused due to hand-holding the camera or mirror flipping action when camera shutter opens. 
Picture taken at F/2.8, ISO 25600 and 1/60s (-1 EV) using EOS 5D Mark II.

Manual Focusing May Still Be a Problem

In most of the scenes, I find that the camera was unable to automatically focus on the subject due to the extremely low light condition and I had to switch to manual focus. However, I still find that manual focusing can still be very difficult to my eyes in the dark.

If you ever run into the same problem, you may want to try out the following technique by using the AF-assist beam firing from the Flash (note: without firing off the flash).
  • Attach and turn ON the flash on the camera. 
  • Access the camera menu and ensure that the 'AF-assist Beam Firing' is turned ON. This will enable the flash to 'fire' some red light whenever the trigger is half-pressed.
  • Since flash is not allowed, the 'Flash-Firing' option in the camera menu needs to be turned OFF. This is very important, if not the flash will just go off and you will have the park attendants coming after you. 
  • Switch the lens focusing mode back to auto-focus mode. Now, just half-press the shutter button and the Flash will 'fire' off some red low light which will help the camera to focus on the subject. 
Picture taken at F/2, ISO 12800 and 1/30s (0 EV) using EOS 500D.

Shoot In RAW

High noise, exposure compensation, etc ... these are strong reasons why you should be shooting in RAW so as to maximize the need for adjustments to the taken photographs during post-processing.

Other Things to Note

  • Go for the 'Live Show' - lighting conditions are way much better (see picture below). You may want to note that the 'Live Show' is only available on Friday, Saturday and Public Holidays.
  • Park attendants are all over the place, and you will have no chance to use flash. They will chase after you if you do so :) Please do not use flash to protect these nocturnal wild life.
  • It is almost close to impossible to take good pictures during a tram ride (i.e. low light, slow shutter speed and moving). You can try but best thing is to sit back and enjoy the ride experience.
  • There is strong 'dung stench' at certain part of the tram ride, and the women behind me simply throw up. Bring mask or medicated oil if you cannot take strong stench :)
Picture taken at F/2.8, ISO 25600 and 1/400s (0 EV) using EOS 5D Mark II.


Read more
9 Nov 2013
Chasing Stars ... Trails

I have been chasing stars for the past one month. Not movie stars but stars in the sky.

Many had wondered whether shooting star trails in a bright island like Singapore is possible. Not only that, our skies are usually cloudy and rarely clear. Despite these adverse conditions, shooting star trails is definitely possible in Singapore.

Shooting star trails has never been easy in the month of October and November when the weather is usually wet and the sky is always cloudy. Whenever there is an opportunity of good weather at night, I would get out of the home and try out at various locations/timings with different camera settings.
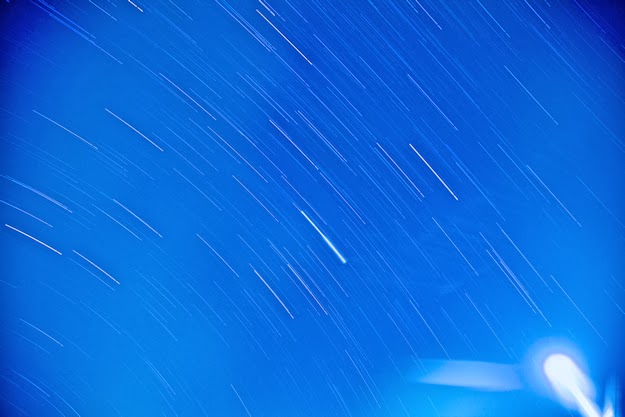
Star trail taken at Sentul Crescent. 121 photographs stacked (ISO 100, F/4, 30 secs). 

Based on my research and experience so far, I've put together a list of recommendations on how to take star trails in Singapore to help any enthusiast who would like to do so.

Equipment Needed

Camera

Camera that is capable of shooting in long exposure.

Fast Lenses

Fast lenses with wide aperture (i.e. smallest F-number that you can get). It does not matter whether it is a wide-angle lens or zoom lens as it only affects your field of view. However, you may want to take note that using a lens with longer focal length can capture a longer trail given the same amount of time as captured with a shorter focal length.

Tripod

As the star trail is shot on long exposure over a rather long period of time, a steady tripod would be required. If shooting in the open, additional weights to weight down the tripod may be required to reduce potential shakes on camera caused by strong wind (if any).

Remote Trigger

Wired remote trigger that is capable of locking the shutter press. This is necessary as multiple long exposure photographs will be taken in continuous shooting mode over a long period of time. Alternatively an intervalometer should be used if you intend to have exposure of each photograph longer than 30 seconds.

Star trail taken at Sentul Crescent. 135 photographs stacked (ISO 400, F/4, 30 secs). 

Techniques, Camera Settings and Parameters

Capturing star trails requires long exposure of 30 seconds or longer. In a bright island like Singapore, there are 2 problems that one would face while trying to capture star trails. 
  • First, the stars are barely visible to our eyes. Fact is that there are many stars which is not visible to our naked eye but can be captured on the sensitive camera sensor over time. The settings on the camera needs to be sensitive enough to pick up the stars which is least bright in the sky.
  • Second, a very long exposure could easily wash out the picture as our skies are bright. Hence it is difficult but important to make the balance of having sensitive enough settings and yet not over-exposing the picture taken.

Shoot In JPEG Instead of RAW

The entire technique will require taking multiple long exposure shot over time, and stacking the photographs together to show the star trail. Hence shooting in JPEG will give a smaller file size which take up less space and less resource intensive on your computer during the stacking time.

Aperture

The aperture need to be as wide open as possible with the smallest F-number used. This will enable more light to be taken in onto the sensor so that even the least bright star can be captured.

Exposure Time

An exposure time of 30 seconds is recommended for each photograph. This will enable a sufficient trail of the star to be captured, and a duration of 15mins with 30 seconds exposure interval should give you quite a fair bit of star trails. The other reason for 30 seconds is that the camera does not need to go into bulb mode, where continuous shooting will require require an intervalometer.

Note: The longer the exposure, the longer the star trail. To have a hyper long exposure in a single shoot without the picture being washed out would mean that aperture needs to be as small as possible and ISO as low as possible, which does not work out in our bright sky. Based on my experiments (see picture below), a single exposure of 10 mins does not pick up as many star trails as compared to 40 exposures of 30 secs.
Star trail taken at Riverside Walk. Single long exposure ISO 100, F/4, 600 secs). 

ISO

This is a tricky setting that needs to be balanced. Although the sensor needs to be as sensitive to light as possible, high ISO will introduce more noise to the picture taken, not to mention even more noise from long exposure.

With the aperture wide-open and high ISO used, the exposure time may be too short to capture a proper length of the star trail. Based on my experiments so far, an ISO of 400 is about right without over-exposing the picture and yet sensitive enough to pick up the light from the stars.

Continuous Drive/Shooting Mode

The camera needs to be continuous shooting over the entire period of time (e.g. 1 hour of 30 seconds exposure for each photograph). In order not to have "breaks" in between due to the camera processing the photograph after 30 seconds, you will need a wired remote trigger that is capable of locking the shutter press throughout the entire period.

White Balance Set to Tungsten

If taking pictures in JPEG (even if you are not), it is best to set the white balance to tungsten. Believe it or not, our bright skies are "lighted" with the city lights which are of yellowish/orange tint. Setting to Tungsten will make your sky more 'blue'.

Take Test Shots

While adjusting your settings and taking test shot, I strongly suggest that ISO should be the parameter to be first varied with when required i.e. if the picture is over-exposed with the widest aperture over 30 seconds, then stop-down the ISO.

The star trails will not be visible on the LCD display of the camera. You will need to zoom in 100% on the LCD display to see the little trails. This is a good way to see if the sky is too cloudy for capturing star trails.

Understanding Directions of Star Trails

Semi-Circular Star Trail Patterns at True North/South Pole

Stars will have a semi-circular trail if pointing at True North or South Pole. Singapore is located near the equator with a latitude of about 1°. This means that we will never get a full circular star trail. The best we can get is a semi-circle star trail pointing at True North, and slightly less than a semi-circle star trail pointing at True South.

It is important to note that True North/South is different from the Magnetic North/South which is our typical compass. The angle of difference between True and Magnetic North/South is known as the magnetic declination which can be computed at http://www.ngdc.noaa.gov/geomag-web/#declination. Please note that magnetic declination does vary over time.

Therefore, if you want a circular star trail, simply point towards the Magnetic North/South as indicated in your magnetic compass and offset it by the amount of magnetic declination. At the time of writing this article, the magnetic declination is 0° 13' 3"East i.e. Magnetic North is 0° 13' 3" east of True North (and similar computation for South).

Stars has an anti-clockwise trail when pointing towards True North, and clockwise trail in the True South. Based on my research and observation, the stars will take at least 6-8 hours to move across the horizons from left to right.

Vertical Star Trail Patterns at East or West

If you are pointing towards East or West, the star trails will appear vertical in your picture frame. If your lens is wide enough, the star trails on the extreme left of your picture frame will appear to bend towards the top left edge while the star trails on the extreme right of your picture frame will appear to bend towards the top right edge.

The star trail will look something like the following if taken pointing towards NorthEast direction.
Star trail taken at Punggol Drive. 67 photographs stacked (ISO 400, F/4, 30 secs). 

Stacking Your Star Trails Photographs

Once all your photographs have been taken, you will need to stack them in Photoshop so that the star trail will appear in a single photograph. The following are the keys steps to stack them using Photoshop:
  • From Photoshop, select Files --> Scripts --> Load Files Into Stack ...
  • Select all the star trail photographs that you have taken and click 'OK'. This process will take relatively long time to complete depending on the number of photographs you have and system resources (i.e. CPU speed, memory, etc.)
  • Once all the photographs are loaded into stack which you can see each photograph as a layer, you will need to change the Blending Mode for each layer to 'Lighten'. As the layers are blended and lighten, the star trail will appear.
  • Merge all the layers into one and you have your star trail picture.
Note: I'm not providing a detailed instruction here as there are many resources in the Internet that you can googled which will show you how to. 

Other Things to Note

  • Avoid taking star trails in extremely "early hours" in the night e.g. beyond 1am. This is because the weather will turn cold and dew will start to condense on the surface of your lens which will ruin your shots.
  • Please be extremely careful if you are going to a location which is dark and deserted. You definitely do not want anything to happen such as robbery or bitten by wild dogs, etc.
Star trail taken at Sentul Crescent. 46 photographs stacked (ISO 200, F/4, 30 secs). 

Please visit http://jefzlim.smugmug.com/Themes/Star-Trails to see the higher resolution and full size image of the star trails that I've taken.


Read more
8 Nov 2013
Creating An Urban Montage

I was reading one of my photography magazine and came across an article about creating an urban montage. The technique was easy and so I gave it a try. To my surprise, I really like the outcome as it look like an art piece.
Picture taken at Universal Studio Singapore. Click on it to see the higher resolution full size picture.

Steps to Create the Montage

1. Choose a picture - I had gone through and tried on various types of photographs, and find that the montage looks great with vibrant pictures of landscape or cityscape that have quite a fair bit of details. (That's my opinion - feel free to try out whatever seems good to you :)

2. Use Photoshop to duplicate 12 additional copies (layers) of the picture, with each layer rotated incrementally at 30-degrees. In other words, you will have 6 of layers rotated at 30, 60, 90, 120, 150 and 180 in clockwise direction, and the other 6 layers rotated in similar angles in anti-clockwise direction.
(Note: Any angle of rotation can be use, and it doesn't need to have 12 additional copies. In my case, I followed the magazine because 12 copies of 30-degree rotation each will complete a 360-degree rotation.)

3. Set the blending mode for each of the 12 layers to "Soft Light". Lower the opacity of each layer if the montage looks a little too overwhelming after the blending.

4. Shift and move each layer around to create the montage. There is no science to this - it is all dependent on you playing around and shifting each layers to give the desired montage "look" of your picture.


That's all! Simple technique that can create really beautiful artistic looking pictures. Try it out :)


Read more