.png)
 By
By  at 7:57 pm

Picture taken with ISO 25600, de-noised using DxO Optics Pro 9 (PRIME).
What is Image Noise?
Grainy-looking color splotches in photographs are known as noise (see picture below). Noise could either be a color noise or luminance noise (or both). Color noise shows up as colored pixels (e.g. red and green pixels) in the photographs, while luminance noise is prevalent in the brightness of a color (i.e. grains across a color).
A 100% cropped of a section from the 1st picture above, showing the amount of noise taken at ISO 25600 using Canon EOS 5D Mark II.
What Causes Image Noise?
Noise are produced in photographs which is caused by:- High ISO
- Long exposure time
- Small sensor size - small sensor size like phone cameras will produce grainier pictures as compared to DSLR sensor.
- High ratio of pixel density to sensor size - A 20 megapixel on a small sensor will produce more noise compared to 20 megapixel on a larger sensor.
- Shadows or poorly illuminated areas
How can Noise Be Reduced?
Besides from observing the above conditions that could result in noise when taking photographs, there are also other imaging softwares that could help to reduce noise during post-processing. I uses Apple's Aperture 3 in my processing workflow and rely on the adjustments (including de-noise) for 90% of my photographs, while the remaining 10% uses Photoshop for additional creativity work.It is important to understand that when an image is de-noised, certain amount of details may be lost and the photograph may appear to be 'softer' (or losing some amount of sharpness) depending on the software used.
De-noise Comparison between Aperture 3, Nil Dfine 2 and DxO Optics Pro 9
For de-noise, Aperture 3 typically does a great work for most of my photographs since they are usually taken within an acceptable ISO level (up to 3200).In these particular set of photographs taken at Singapore Night Safari using ISO 25600, I had compared the de-noise capability of Aperture 3, Nik Dfine 2 as well as the new DxO Optics Pro 9 which has introduced PRIME, a technology a revolutionary noise reduction which claim to be able to re-produce detailed, sharp and vividly-colored images.
Note: This is the first time using DxO Optics Pro 9, which I had downloaded the full-functional one-month try copy from DxO Mark. The adjustment are based on some of the preset functions offered in the software.
For comparison purposes, I've cropped out 50% of the full-size image above. Please click on the image to view the higher resolution image.
RAW Files Without Post-Processing
As seen from the RAW photographs below, the amount of noise taken at ISO 25600 is extremely high without any post-processing.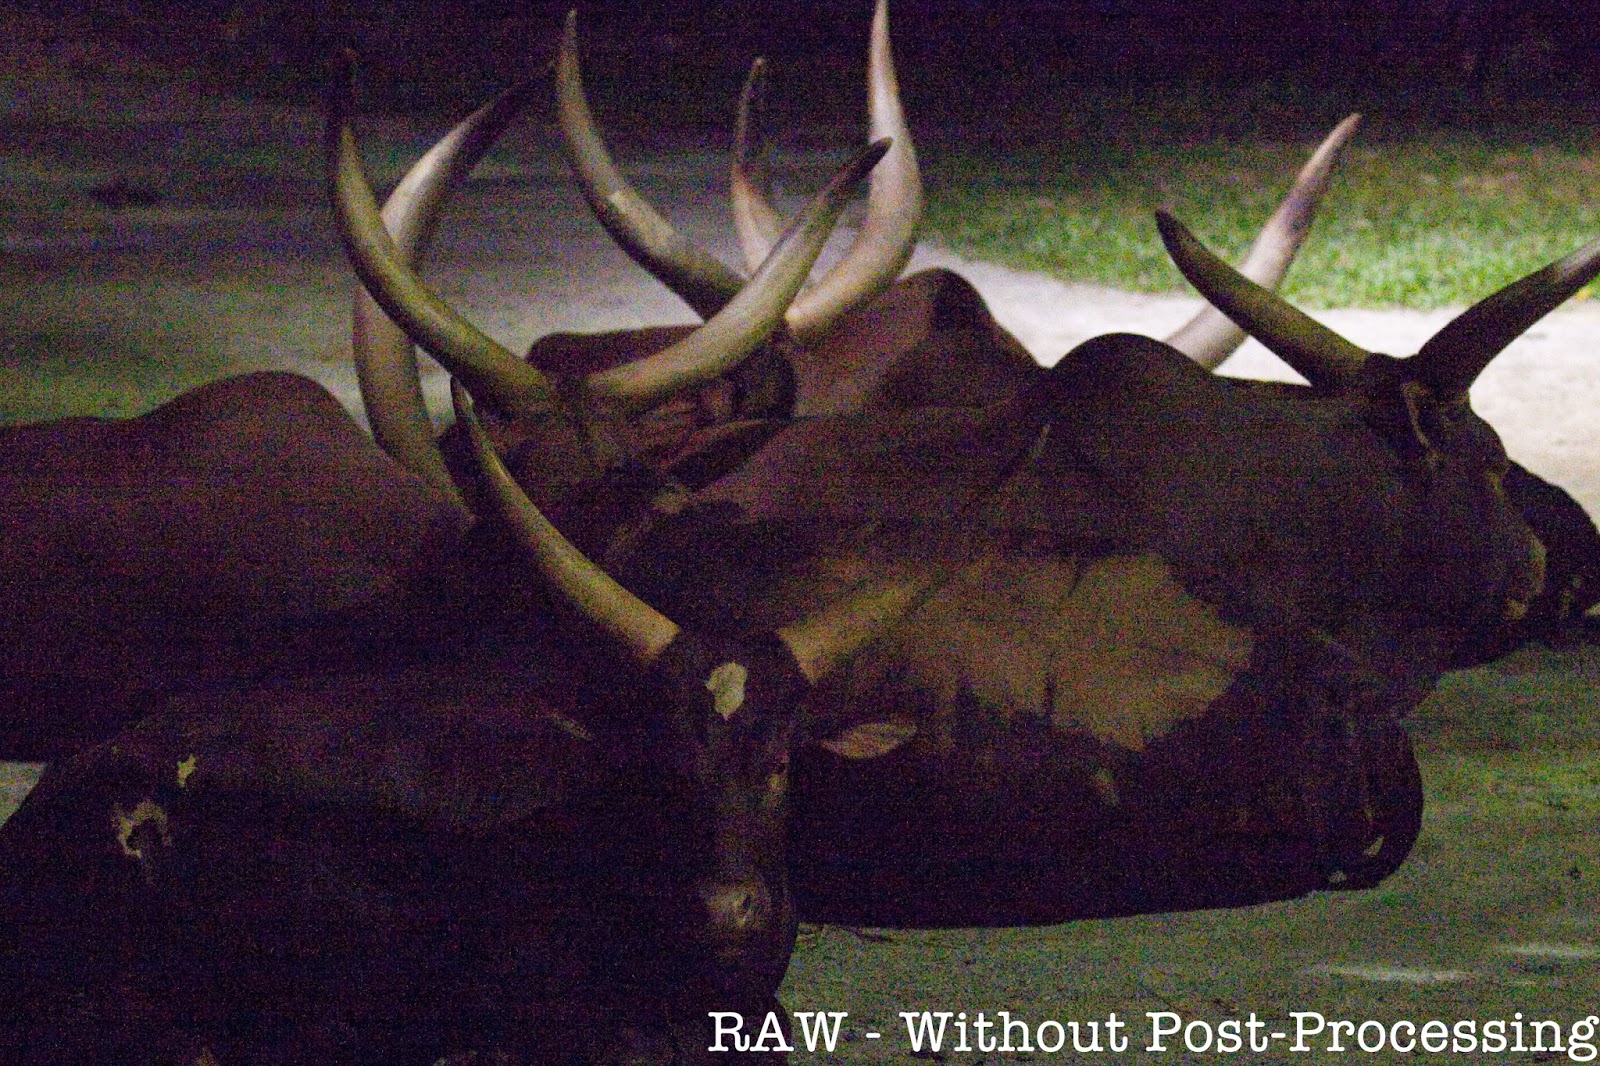
De-noise using Aperture 3
Aperture 3 does a fairly good job in removing most of the noise in the picture and yet retain most of the details. However, the picture appears to be a little 'soft' and unsharp due to the de-noising.
De-noise using Nik Dfine 2
There appears to be color splotches of noise despite pushing the color and contrast noise control to the extreme. Just like aperture 3, the photograph appear to be 'soft' and a little un-sharp due to the de-noising.
De-noise using DxO Optics Pro 9 (Standard)
DxO Optics Pro 9 offers standard de-noising function as well as the PRIME de-noising technology. The standard de-noising function does a very good job in removing the noise. The processed photograph is not as soft as compared with Aperture 3 and Nik's Dfine 2. There is also noticeable enhancement to the colors.
De-noise using DxO Optics Pro 9 (PRIME)
The PRIME de-noising function is remarkable. Very noticeable that the details and sharpness were retained. Not only that, the colors are also enhanced. I also noticed that some barrel distortion on the picture has also been corrected.
Conclusion
Picture speaks a thousand words - from the comparison, it is quite obvious that the DxO Optics Pro 9 produces remarkable results using its PRIME de-noising technology. However, it takes about 9-10 minutes processing time to output a single photograph of resolution 5616 x 3744 on my iMac (2.8GHz Intel iCore i5 with 8GB memory) which can be a major concern if processing hundreds of pictures.Once again, the level of acceptable noise is very subjective to individuals. For me, I would still rely on Aperture 3 as my key workflow processing tool. Although I'm still using the free one-month trial of DxO Optics Pro 9, I may consider purchasing a licensed copy as it would give me the piece of mind without hesitation to bump the ISO, or recover a badly under-exposed photograph.
Note: DxO Optics Pro 9 is on an introductory offer till 20-Nov-2013. The standard edition costs 99 USD (instead of 169 USD), while the elite edition costs 199 USD (instead of 299 USD). Check it out at http://www.dxomark.com/.

Another picture taken with ISO 25600, de-noised using DxO Optics Pro 9 (PRIME).
Please visit http://jefzlim.smugmug.com/Destinations/Singapore/Night-Safari to see the entire bunch of photographs taken at Singapore Night Safari using ISO 25600 and de-noised using DxO Optics Pro 9 (PRIME).


Thankyou for sharing. I really think DxO Optics Pro is doing the best work.
ReplyDeleteKeep up the good job!
De-Noise Using Dxo Optics Pro 9 - Jefz Lim Photography Blog >>>>> Download Now
ReplyDelete>>>>> Download Full
De-Noise Using Dxo Optics Pro 9 - Jefz Lim Photography Blog >>>>> Download LINK
>>>>> Download Now
De-Noise Using Dxo Optics Pro 9 - Jefz Lim Photography Blog >>>>> Download Full
>>>>> Download LINK dO